
API Gateway
API Gateway Service는 사용자가 설정한 Routing 설정에 따라 각 endpoint(client side에서 microservice 주소를 직접 이용)로 client를 대신해서 요청하고, 응답을 받아서 다시 client에게 전달해주는 Proxy(대리인)역할을 한다.
시스템의 내부 구조는 숨기고 외부의 요청에 대해 적절한 형태로 가공해서 응답할 수 있는 장점이 있다.
API Gateway Service가 없을 시에 client에서는 microservice를 호출할 때, client쪽에서 endpoint를 설정하게 된다.
그런데 만약 microservice의 설정이 변경되어 endpoint가 변경되거나, 새로운 microservice가 추가되어 이에 해당하는 endpoint를 client에 추가할 때 client도 관련해서 수정 및 재배포가 이루어져야 한다.
이러한 불편함을 없애고자 단일 진입점이 존재하는 개발이 필요하게 되었다.
그래서 API Gateway를 둔 것이다.
각각의 마이크로 서비스로 요청되는 모든 정보에 대해서 일괄적으로 처리할 수 있게 된다.
그래서 모바일로 만들어진 앱도 상관없다.
클라이언트는 게이트웨이만 상대하기 때문에 직접적으로 마이크로 서비스를 호출하지 않는다,
그래서 정보 변경 및 갱신 작업이 쉬워진다.

Gateway 기능
- 인증 및 권한 부여
- 서비스 검색 통합
- 응답 캐싱 저장
- 일괄적인 정책, 회로 차단기 및 Qos 다시 시도
- 속도 제한
- 부하 분산
- 로깅, 추적(누구에 의해 호출? 처음 진입점은 어디? 다음단계는 어디? 등), 상관 관계
- 헤더, 쿼리 문자열 및 청구 변환
- IP 허용 목록에 추가
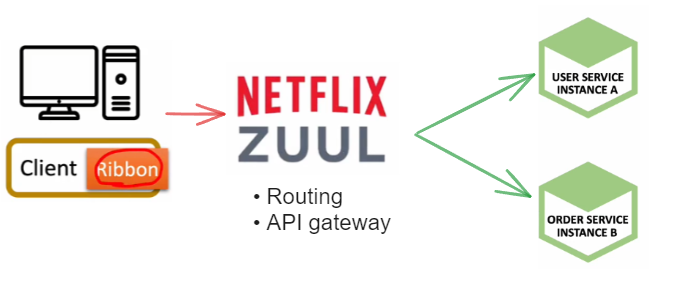
Netfilx Riboon
Spring Could에서 MSA간 통신
Netfilx Riboon
1. RestTemplate
- 전통적인 사용법
- 하나의 웹 어플리케이션에서 다른 어플리케이션을 사용하기 위해 사용된 API
- 다른 어플리케이션을 호출할 때 접속하고자하는 서버의 주소, port 번호 등을 기재

2. Feign Client
- Spring Cloud에서 사용하는 API
- interface를 생성하고 외부 microservice 이름만으로 다른 microsercive를 호출할 수 있음
- RestTemplate처럼 직접적인 서버 주소나 포트 번호 없이 마이크로 서비스 이름만으로 호출

▶ 문제는 Load Balancer를 어디에 구축해서 작업할 것인가?
- Ribbon : Client sid Load balancer
- Spring Could에서 Load Balancer로 Ribbon 채택
- Ribbon은 Netfliex에서 만든 서비스로 Spring Could에 기부한 것임
- 문제점 : 리액트와 같이 비동기를 사용하는 기술들과 호환이 잘 안되어 최근에는 잘 사용하지 않음
- Spring Cloud Ribbon은 Spring Boot 2.4에서 Maintence 상태가 되었음
- Maintenance : 다음 버전에서 사용할지 이 기술을 빼거나 보완하려는 상태
- 장점
- 클라이언트에서 마이크로 서비스의 이름으로 호출
- Health Check(해당 서비스가 정상적으로 작동 중인지 확인)

Netflix Zuul
역할
- Routing
- API gateway
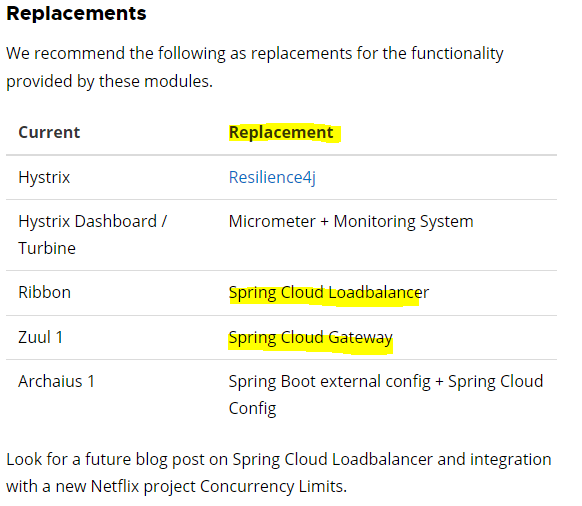
Spring Cloud Zuul은 Spring Boot 2.4에서 Maintenance 상태이다.
아래 링크로 들어가면 관련 내용들이 적혀있다.
Spring Cloud Greenwich.RC1 available now
On behalf of the community, I am pleased to announce that the Release Candidate 1 (RC1) of the Spring Cloud Greenwich Release Train is available today. The release can be found in Spring Milestone repository. You can check out the Greenwich release notes f
spring.io
maintenance mode를 알려준다.

대체품도 알려준다.
Netflix Zuul 구현
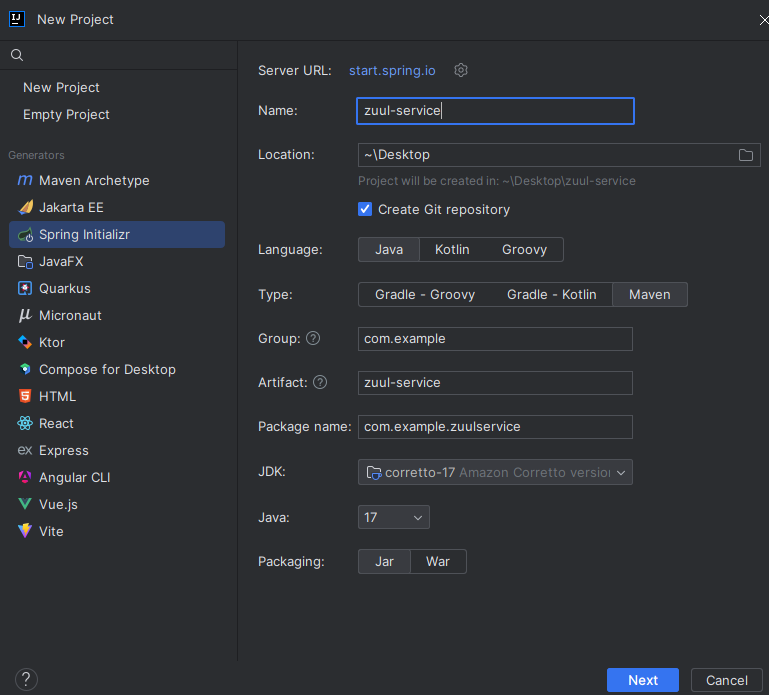
step 1) First Service, Second Service 프로젝트 생성
- Spring Boot : 강의는 2.7.8 사용하지만, 나는 3.2.1을 사용하였다.
- Type : Maven
- Dependencies : Lombok, Spring Web, Eureka Discovery Client

step 2) First Service, Second Service
❓참고 [Spring] @Controller와 @RestController의 차이
[Spring] @Controller와 @RestController의 차이
요약 Spring MVC의 @RestController은 @Controller와 @ResponseBody의 조합 (@Controller + @ResponseBody = @RestController) @Controller의 역할은 Model 객체를 만들어 데이터를 담고 View를 찾는 것. @RestController는 단순히 객체만
sesam-dev.tistory.com
Controller
@RestController
@RequestMapping("/")
public class FirstServiceController {
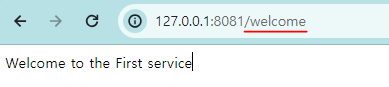
@GetMapping("/welcome")
public String welcome() {
return "Welcome to the First service";
}
}
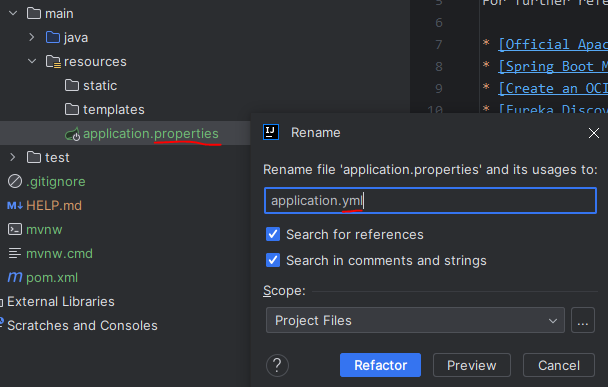
application.yml
application.properties에서 application .yml로 바꾸기
server:
  port: 8081

spring:
  application:
    name: my-first-service

eureka:
  client:
    fetch-registry: false    # 레지스트리에 있는 정보를 가지고 올건지에 대한 여부
    register-with-eureka: false    # 레지스트리에 자신을 등록할 건지에 대한 여부
second-service도 동일하게 프로젝트 생성
Controller
@RestController
@RequestMapping("")
public class SecondServiceController {
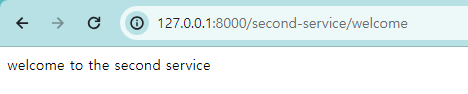
@GetMapping("/welcome")
public String wlecome() {
return "welcome to the second service";
}
}
application.yml
server:
  port: 8082

spring:
  application:
    name: my-second-service

eureka:
  client:
    register-with-eureka: false
    fetch-registry: false
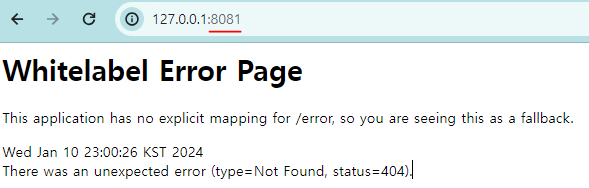
step 3) Test
잘된다.

step 4) Zuul Service (Spring cloud gateway) 프로젝트 생성
- Spring Boot : 2.7.8 2.3.8
- Dependencies : Lombok, Spring Web, Zuul(Zuul이 없어서 강의 깃허브 클론 받아서 따라했음)
step 5) Zuul Service (Spring cloud gateway)
@EnableZuulProxy 추가
@SpringBootApplication
@EnableZuulProxy // 추가
public class ZuulServiceApplication {

    public static void main(String[] args) {
        SpringApplication.run(ZuulServiceApplication.class, args);
    }

}
application.properties에서 application.yml로 바꾸기
server:
  port: 8000

spring:
  application:
    name: my-zuul-service

zuul:
  routes: # 라우팅 설정
    first-service: # 임의의 프로젝트 이름 지정
      path: /first-service/**  #  first-service로 요청되는 모든 항목은
      url: http://localhost:8081  # 여기 url로 갈 것이다.
    second-service:
      path: /second-service/**
      url: http://localhost:8082

step 6) ZuulFiter
각각의 마이크로 서비스가 요청 될 때 사전(ex.인증서비스)/사후(ex.로깅 등)에 호출되는 어떤한 작업들을 일괄적으로 처리 >> 이런 것들을 필터라고 한다.
사전 필터 : 인증서비스
사후 필터 : 로깅
filter 패키지에 ZuulLoggerFilter 클래스 생성
ZuulLoggerFilter
ZuulFilter 상속 받고 Logger 생성한다.
(간단하게 Logger 객체 생생 없이도 Logger를 출력할 수 있는 @Slf4j 애노테이션을 사용하자.
아래는 참고만 하자.)
@Component
public class ZuulLoggingFilter extends ZuulFilter { // ZuulFilter 상속
    Logger logger = LoggerFactory.getLogger(ZuulLoggingFilter.class); // 1. 객체 생성
    @Override
    public Object run() throws ZuulException { // 실제 동작하는 부분
        // 2. 로거 러벨에 따라서 다음 단게에 어떤 데이터를 출력할 것인지 지정
        logger.info("info"); // 로거의 레벨
//        logger.debug("debug"); // 로거의 디버그
//        logger.warn("warn"); // 원인 메시지
//        logger.error("error"); // 에러 메시지
        return null;
    }

    @Override
    public String filterType() {
        return "pre"; // 사전필터이다.
    }

    @Override
    public int filterOrder() { // 필터가 여러 개일 경우, 순서를 말한다.
        return 1;  // 하나밖에 없으니까 그냥 1넣겠음
    }

    @Override
    public boolean shouldFilter() {
        return true; // 필터를 쓰겠다.
    }
}
@Slf4j을 사용하면 log.into 등등 바로 log를 찍을 수 있다.
@Slf4j
@Component
public class ZuulLoggingFilter extends ZuulFilter {
    @Override
    public Object run() throws ZuulException {
        log.info("*************** printing logs: ");

        RequestContext ctx = RequestContext.getCurrentContext();
        HttpServletRequest request = ctx.getRequest();
        log.info("*************** " + request.getRequestURI());

        return null;
    }

    @Override
    public String filterType() {
        return "pre"; // 사전필터이다.
    }

    @Override
    public int filterOrder() { // 필터가 여러 개일 경우, 순서를 말한다.
        return 1;  // 하나밖에 없으니까 그냥 1넣겠음
    }

    @Override
    public boolean shouldFilter() {
        return true; // 필터를 쓰겠다.
    }
}